2026-03-27
server rack complete
diary · 3d · network
15:09
Some time in the past as i acquired the network appliances i have today i thought to buy a rack and make a neat little thing, seeing also the prices for used servers it made a lot of sense to me… But… The actual hardware is not the problem, the problem are the prices of actual racks, i could not find anything below 60€ after shipping. So as any maker would i just applied maker math, if i spend less than 60€ in making it myself i’ll profit the experience from making it (or any tool i buy for it).
Let’s get into my first try, me being an avid 3d printer of course i firstly thought to tackle this through the use of my favorite tool, and so i started by looking at the rack’s standard.
It, unfortunately, is defined in imperial (ik shocker) and it turns out the the actual dimensions are pretty close to metric round values (image from wikipedia):
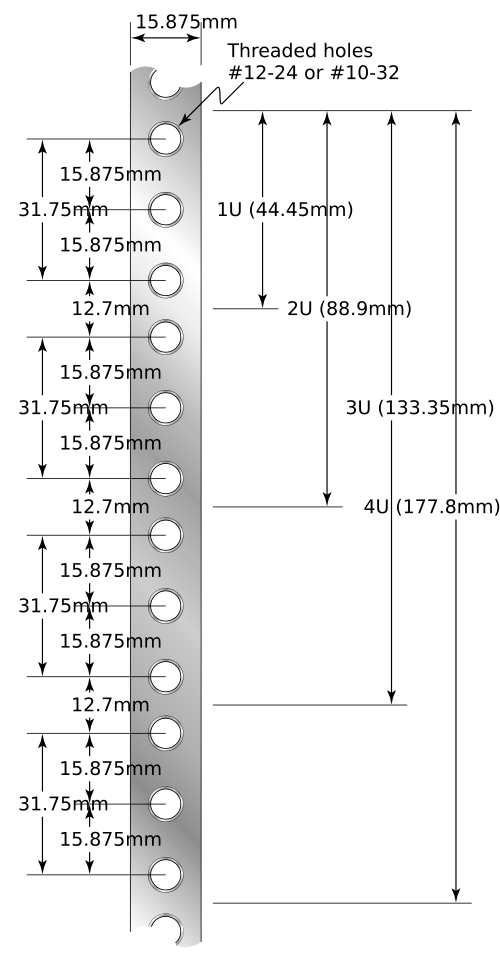 “19” Server rack rail dimensions in mm” by Sakurambo, via Wikimedia Commons, licensed under CC BY-SA 4.0.

And so i bought a some meters of 15mm square tubing with the intent to drill holes at the right distances and the use a nut and bolt instead of the classic captive nut to hold stuff to it and the screw them in place between 2 wooden boards.
And so i hopped into fusion and started modeling some stuff. Firstly i needed a way to bolt the bars to the wood, and i came up with this
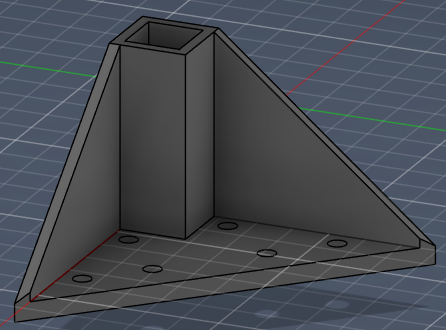
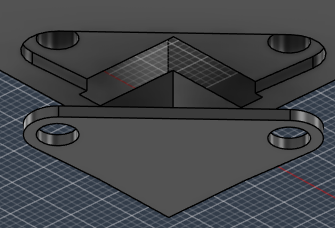 Very simple design, the bar gets pressed through the first component and then the cap gets pressed into it and when you screw it all down the top part wil press on the lower part locking it in place, although i am quite proud of this design it will later be replaced.
Then i made some drill guides
Very simple design, the bar gets pressed through the first component and then the cap gets pressed into it and when you screw it all down the top part wil press on the lower part locking it in place, although i am quite proud of this design it will later be replaced.
Then i made some drill guides 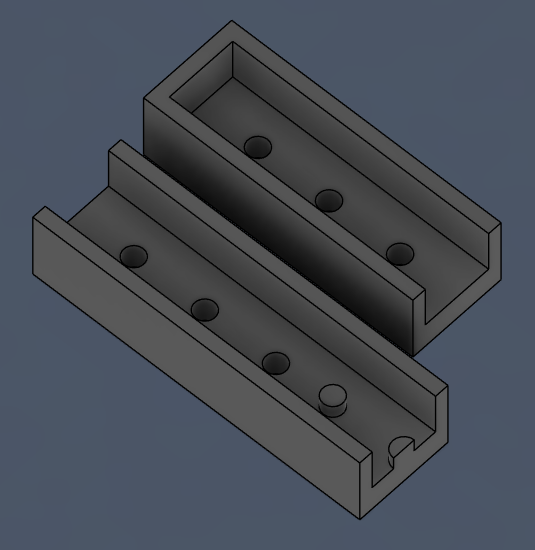 One to start the whole column of holes from the bottom of the bar an the other to chase them to the end.
Some problems i have got with this design:
- The drill chewed up the holes making them not aligned and messing up the spacing
- The heat from the drilling was causing chips to stick to the printed parts
- I needed to print a lot of them for this reasons even tough i was using a drill press
- The sizing constraint from the board i bought ended up making the spacing slightly less than 19 inches
And so i ended up scrapping this idea and just welding a solid chunk of metal with a hole through to fix the rod to the wood
One to start the whole column of holes from the bottom of the bar an the other to chase them to the end.
Some problems i have got with this design:
- The drill chewed up the holes making them not aligned and messing up the spacing
- The heat from the drilling was causing chips to stick to the printed parts
- I needed to print a lot of them for this reasons even tough i was using a drill press
- The sizing constraint from the board i bought ended up making the spacing slightly less than 19 inches
And so i ended up scrapping this idea and just welding a solid chunk of metal with a hole through to fix the rod to the wood
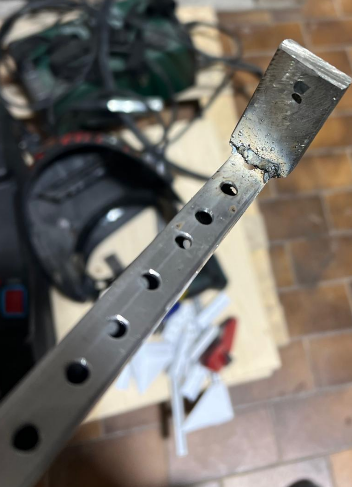 As i welded this later on that evening another friend of mine came in clutch and gifted me some actual rails to use for this
 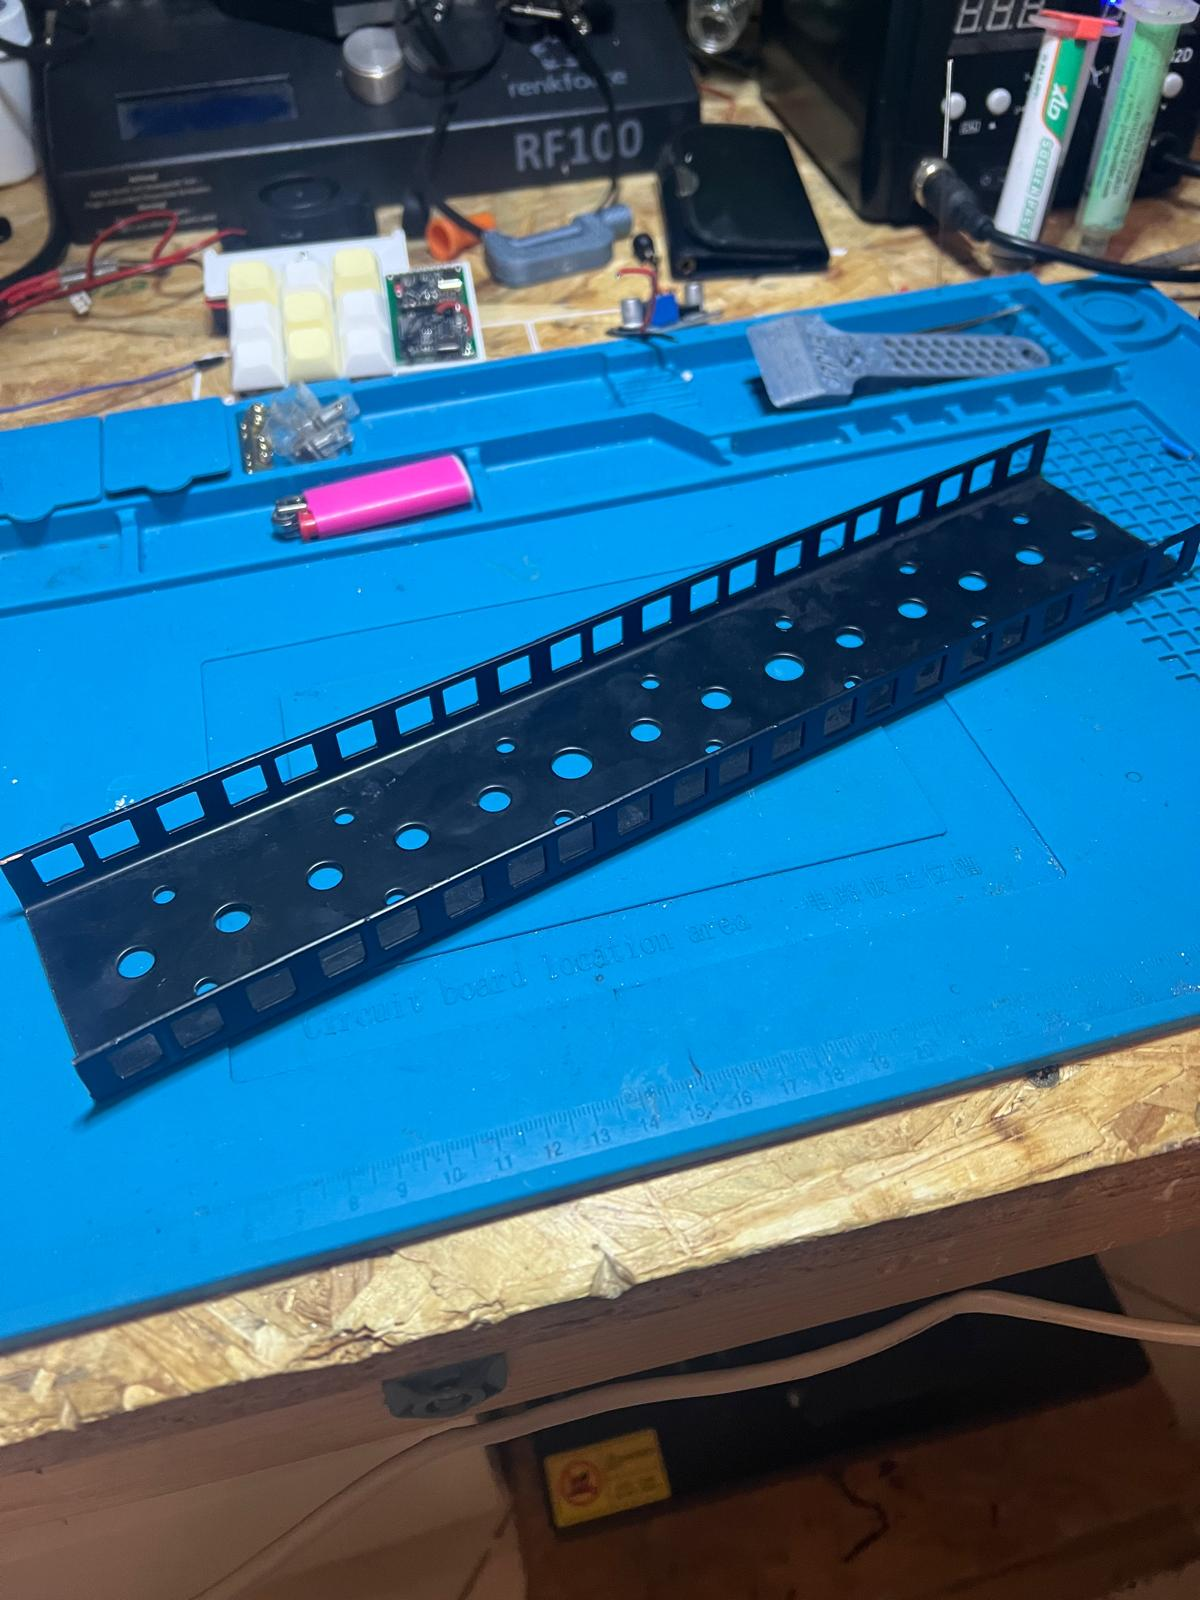 Remembering me of the best rule of engineering: Don’t make what you can buy, that i interpret as “don’t make what you can get for free” (thank you Bocco). So now it’s just a mater of finding a way to fasten these to the wood in some way.
I do have some L brackets i could use for this either welding or screwing them in place although i am not sure about the interference with the cage nuts, i’ll just have to wait for them to arrive to check. Besides i think welding them will warp the rails more than they already are from cutting and grinding
Remembering me of the best rule of engineering: Don’t make what you can buy, that i interpret as “don’t make what you can get for free” (thank you Bocco). So now it’s just a mater of finding a way to fasten these to the wood in some way.
I do have some L brackets i could use for this either welding or screwing them in place although i am not sure about the interference with the cage nuts, i’ll just have to wait for them to arrive to check. Besides i think welding them will warp the rails more than they already are from cutting and grinding
22:21
I ended up screwing them to the rails, to do so i used a a drill press: first i transferred the holes from the l bracket to the rails
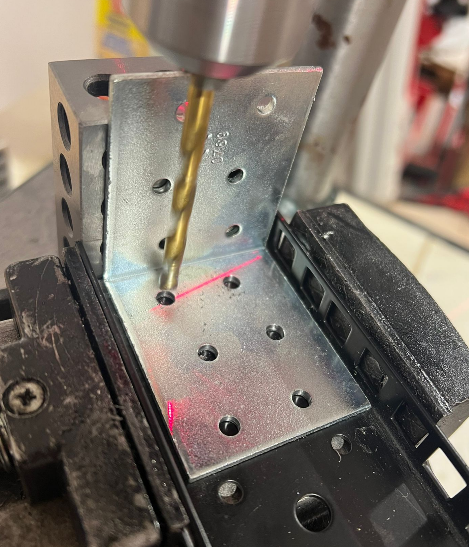 Then i added oil and drilled trough
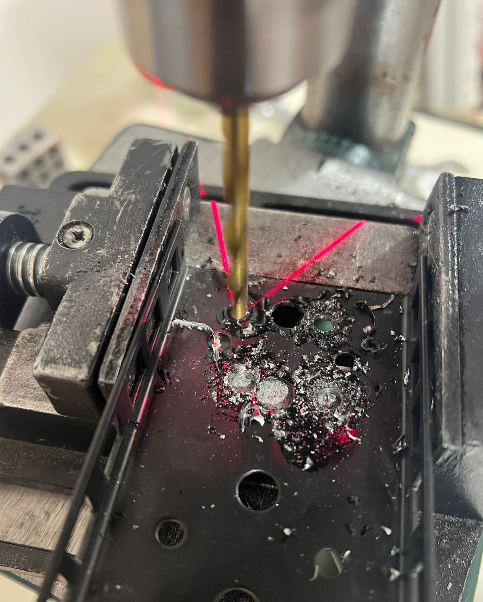 The i just fastened the L brackets
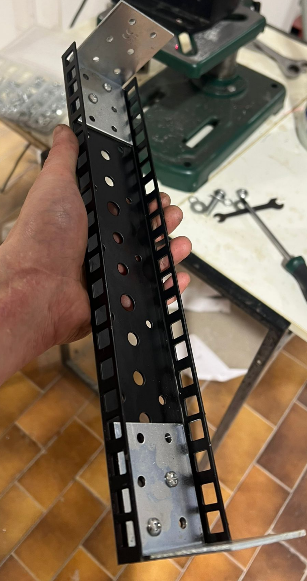 And the just repeated the process twice.
Later i just assembled it, using the square tubular profile for the back support and i ended up with this:
And the just repeated the process twice.
Later i just assembled it, using the square tubular profile for the back support and i ended up with this:
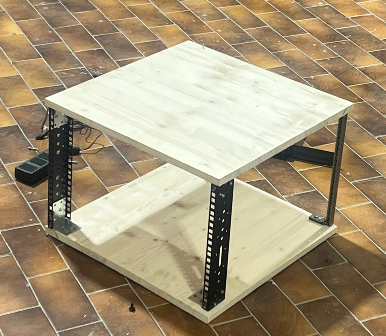 Better to not look at it too close, you might notice how skewed it is.
Then i added the devices and cabled everything, and i must say, for how much it is randomly thrown together it does its job remarkably well.
Better to not look at it too close, you might notice how skewed it is.
Then i added the devices and cabled everything, and i must say, for how much it is randomly thrown together it does its job remarkably well.
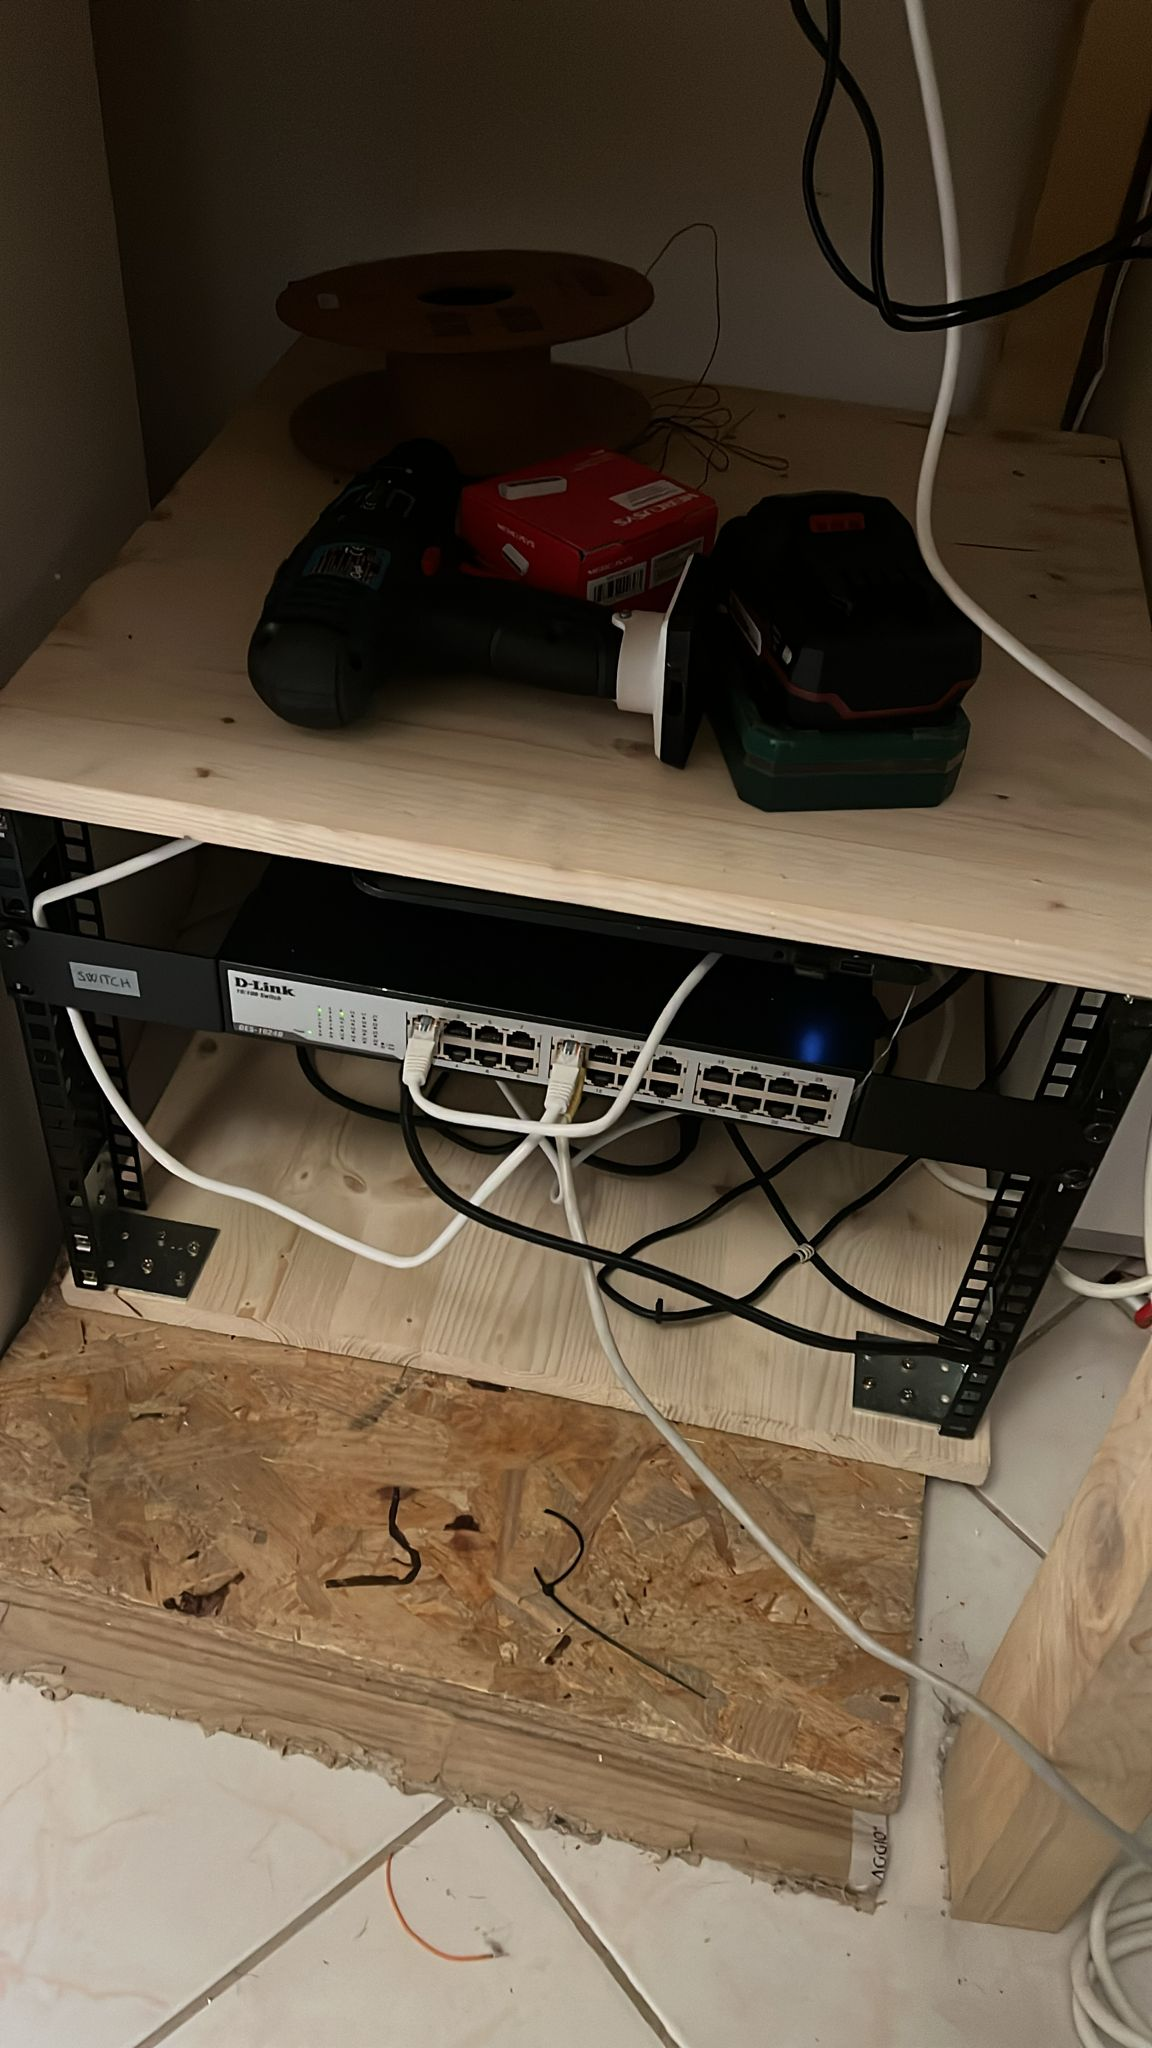 Next up it’s going to be a patch panel, crimped to length cables, an enclosure and an actual drawer for the “server”. And maybe a complete gridfinity grid on top
So that’s about it for this project, i must say, even tho the infrastructure is the same as before, it feels much more professional and i can see the extensibility of such a rack, i will be on the lookout for people to low ball on fb marketplace for actual server hardware. Before ending this entry i would like to add some notable mentions:
Shout out to Sam’s girlfriend for getting doughnuts
 And shout out to Sam for sleeping through the hole process besides me