2026-05-26
spoolStack complete
3d · diary
10:10
Today i’m going to tell you about one of my most recent projects. One of the uses i found most clever and logical for my 3d printer is up cycling old 3d printer spools, sure we took a lot of steps forward to avoid waste, like refillable spools, and cardboard spools, but nothing hits home like giving new life to waste, one of the best way to do so imo is to make spool drawers, there are plenty of models online and some very nice parametric ones to adapt to one of the thousands variation you might have at hand. Here are some notable mentions: - Https://www.printables.com/model/354639-overture-spool-box (this worked for recent overture spools) - Https://makerworld.com/en/models/1090611-drawer-system-for-cardboard-spools#profileId-1084054 (this did not fit for me but it’s very nicely documented and also has parametric files to use)
Anyway drawers aside, one of the problem that arises with them is how to stack the spools together, and i tough that it would be a nice problem to solve and so i started tinkering.
What first came to mind was using a threaded rod and captive nuts to basically clamp the spools together, but i thought there’s no use for a stack if you cant spin it around to reach the drawers on the back side, using ball bearings on the top and bottom clamps would be a good idea and cheap at that.
BUT… Where’s the fun in using external hardware?? And so i spun up Fusion and set of to design something that: didn’t use external hardware, didn’t have a length limitation, simple in design, worked for many spools,and capable of spinning individual spools in the stack.
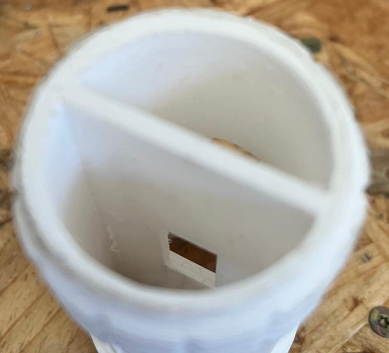
What i came up with initially was basically my first idea of using a threaded rod but 3d printed, but you have a height limitation in that, so i cut the rod in different segments and made a nut with a double cone shape to fit some variation on the ID of the spools. The rod and the nut are just tall enough to be able to clamp the spool and leave some thread on the nut to screw in the next segment, this will lock the nut in place due to the forces of the rods pushing against each other. So what you do is tighten the nuts just enough to constrain the movement of the spool and then add another segment of the rod above to put another spool in. Here are some pictures of this first design:
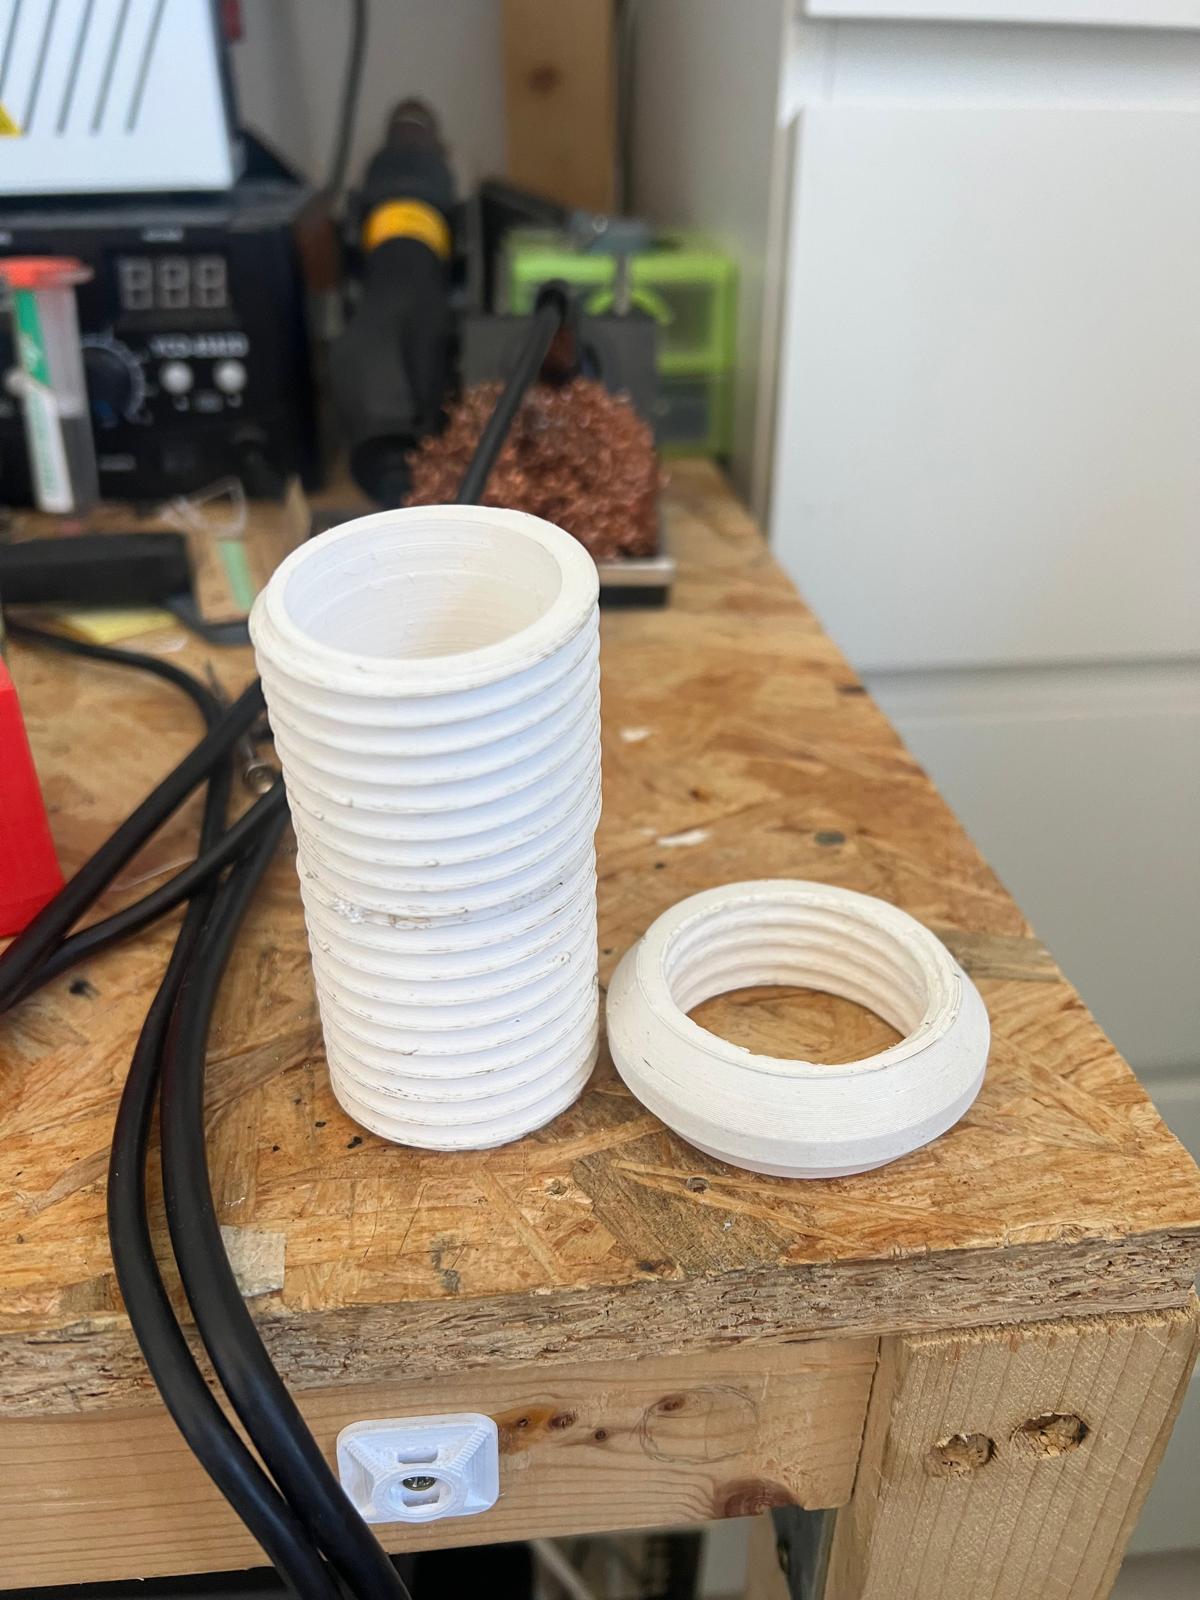 (i had to cut it in half at some point sorry)
So this worked nicely for about 10 seconds, then i got frustrated because the nut internal threads wouldn’t print nicely and it was very difficult to screw it in, and the thread on the rod believe it or not would cut my hand when i tried to screw it in. Oh and also print time was atrocious.
And so i wen’t back to thinking, the only thing i could do to the nut without compromising it’s simplicity too much was to add some grooves to better grip it, and to cut on print time i realised i only really needed the threads on the rod near the ends of it so i smoothed out the center of the rod:
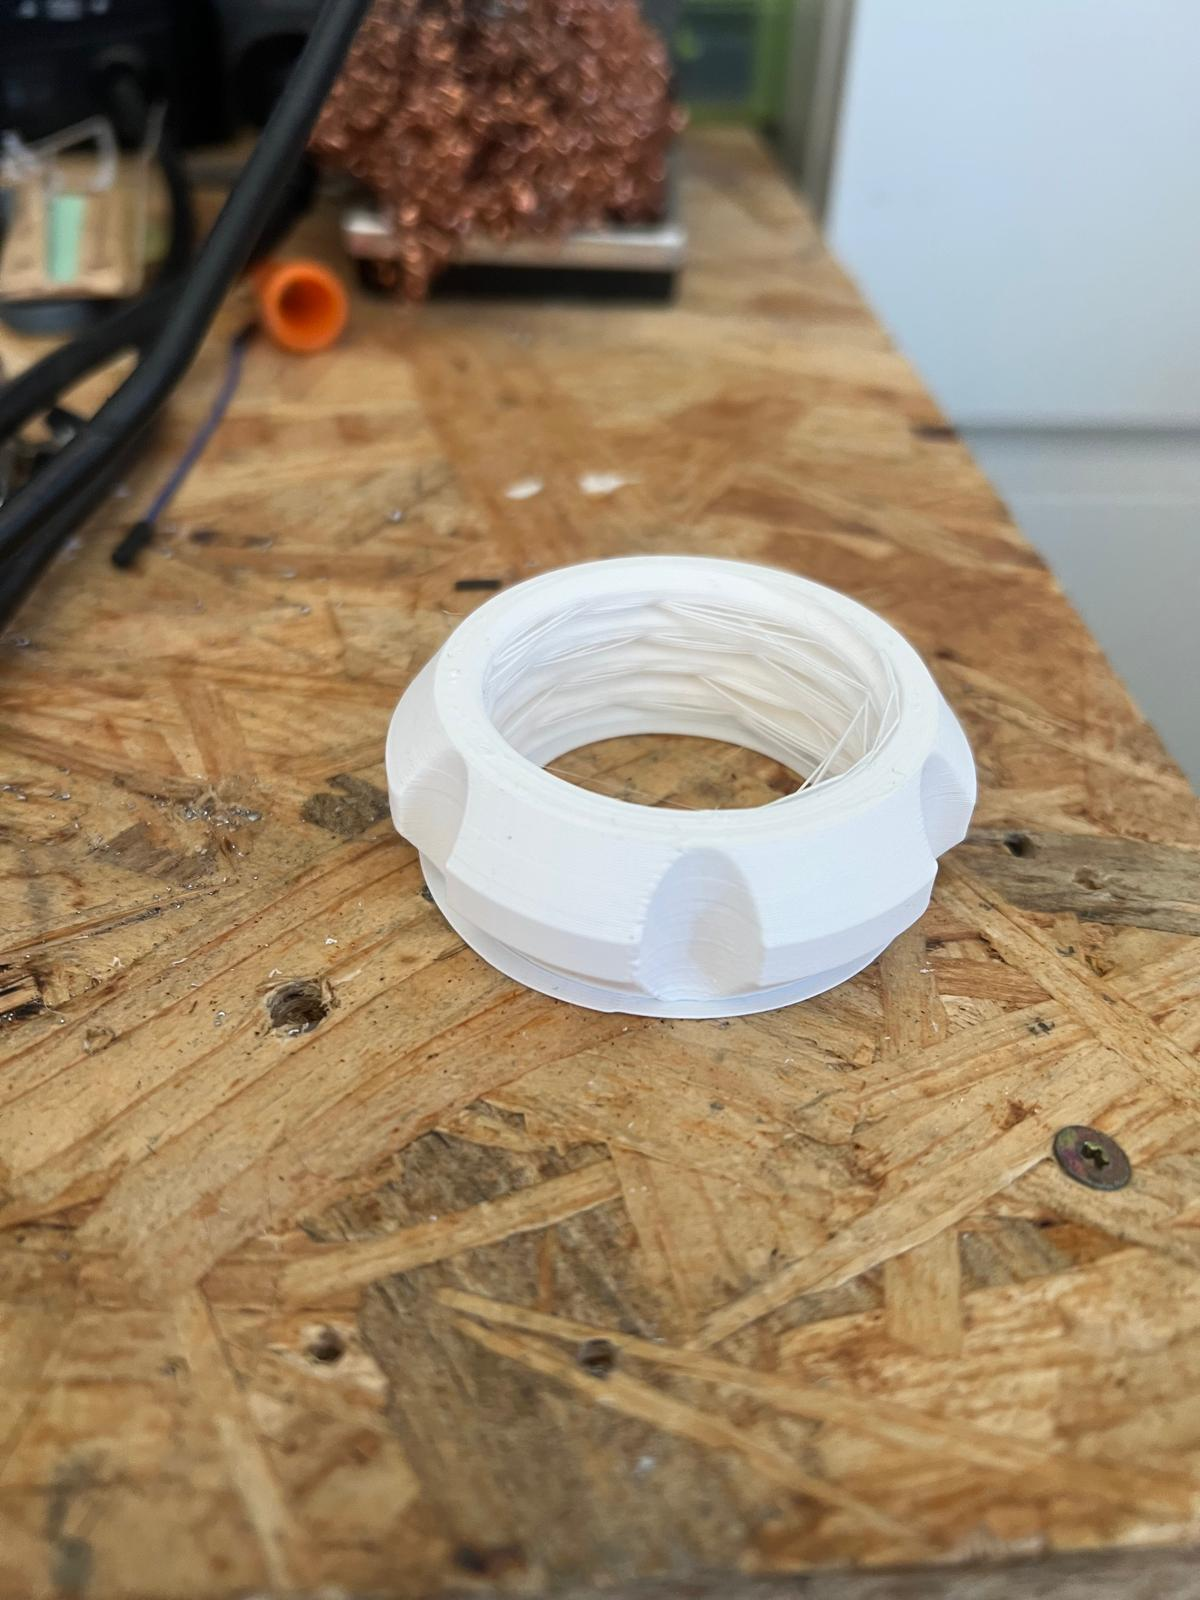
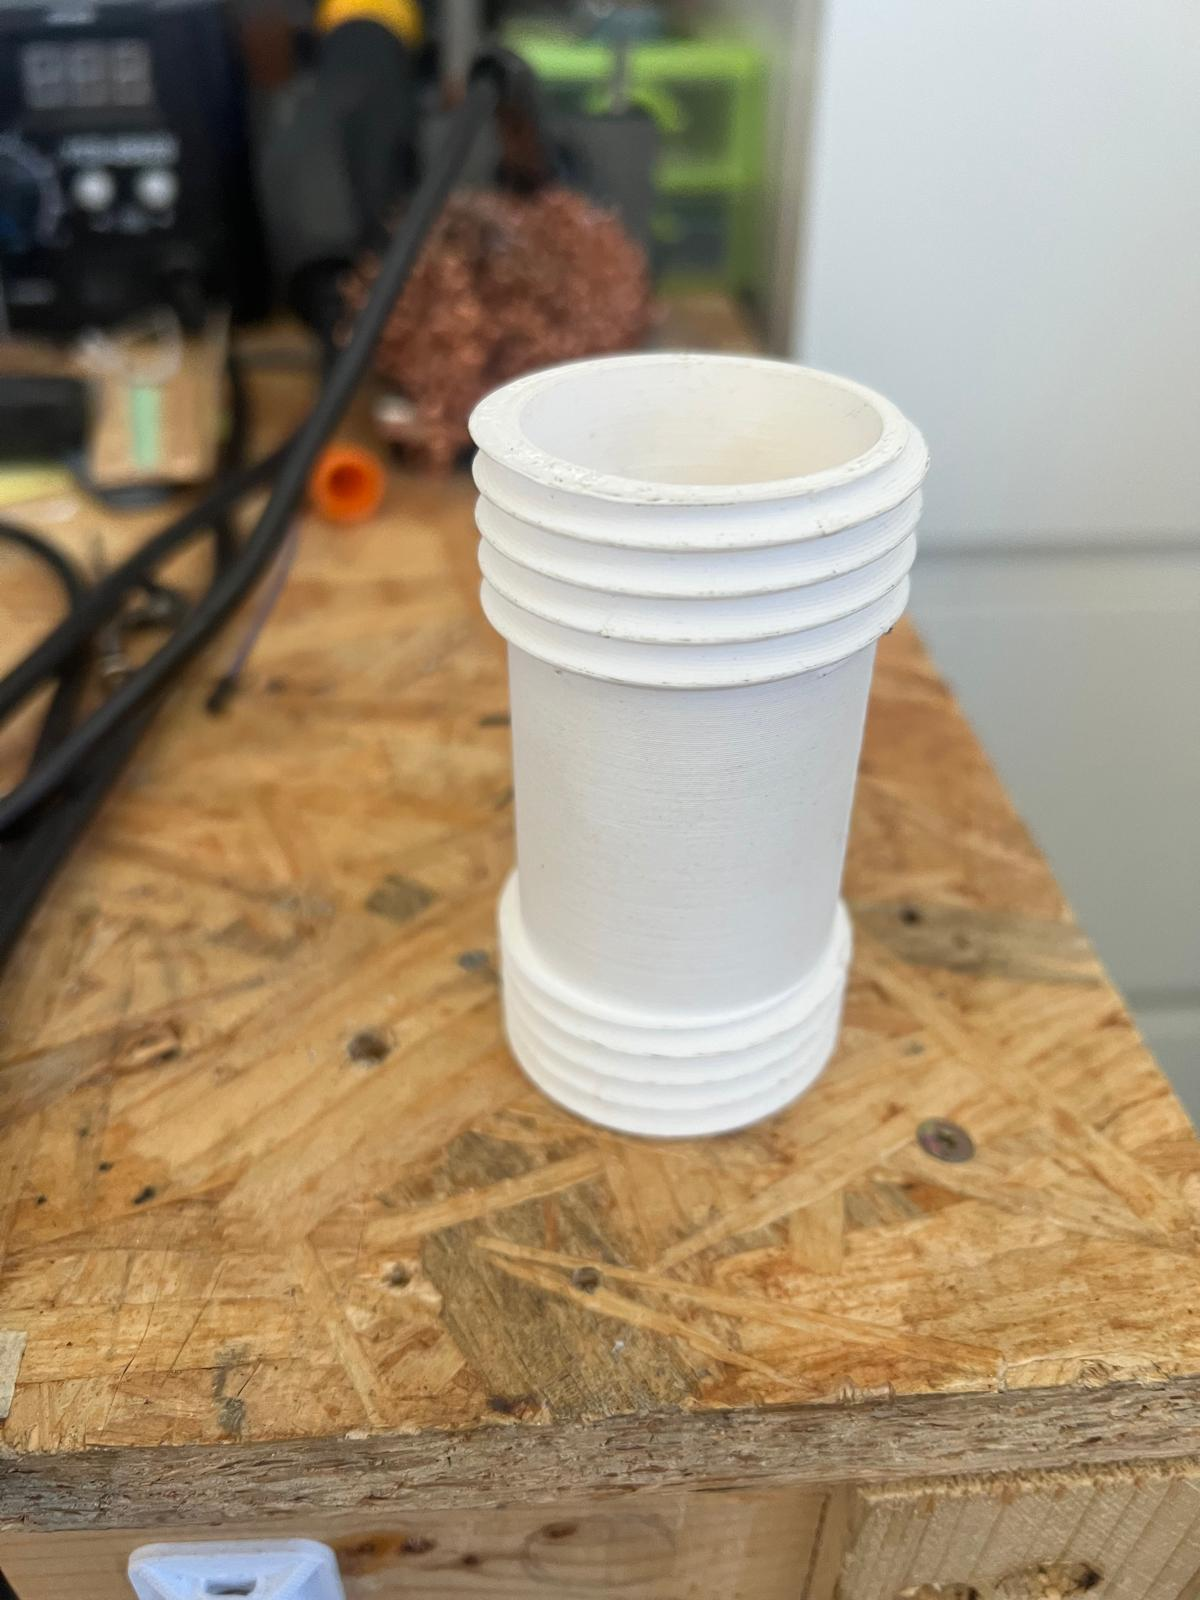
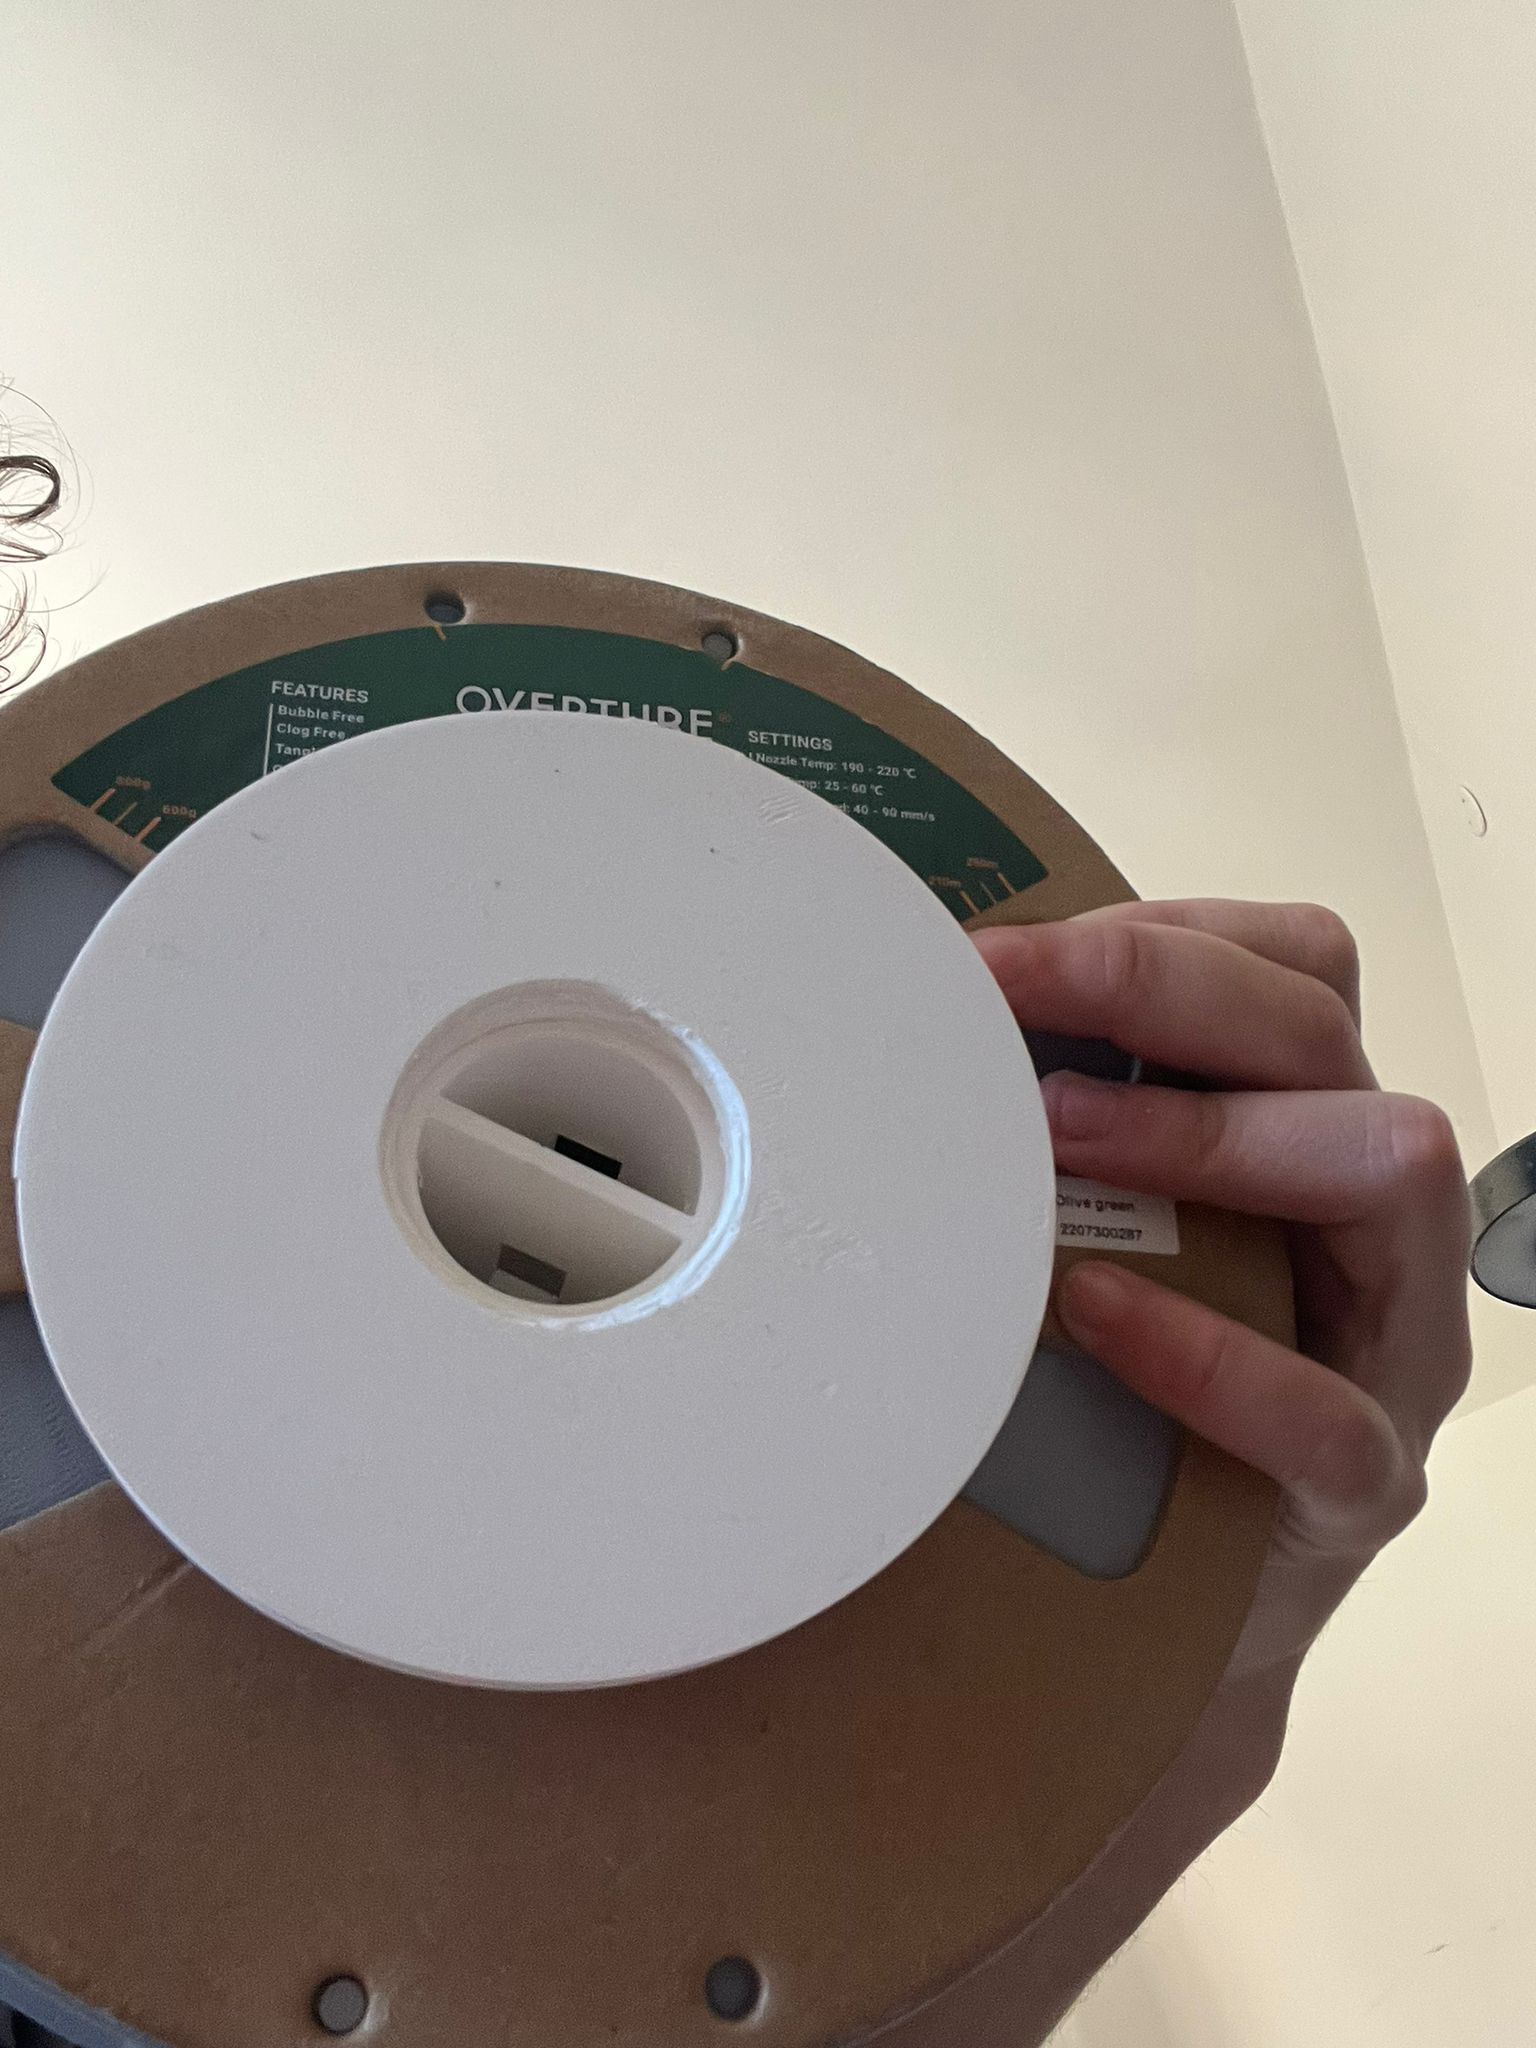
This design still was difficult to screw in since the thread standard (M45) isn’t really made to be 3dprinted but i wanted to avoid using custom threads as i think they are rarely the solution, and difficult to parameterize. Also there is a risk of the cylinder collapsing on itself. The solution came to me while i was post processing one of the nuts, cleaning the internal threads is a difficult task that requires you to reach into the thread with a X-Acto knife to cut the lines that didn’t adhere properly to the layer below, and i was thinking on how it would be so much easier if i had an m45 internal thread cutter, and that’s when it hit me, i could just have features on the screw to clean the thread for me, and so i added groves onto the crest of the thread and gave the screw some reinforcements and a better way to grab and spin it:
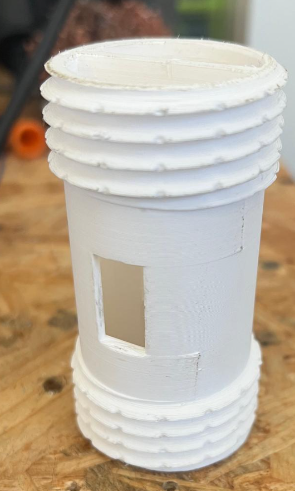
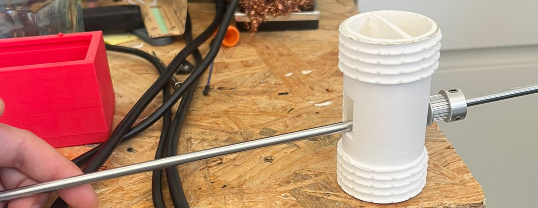
Now i can fit a rod through it for leverage, or use pliers to keep it still while screwing a nut (otherwise the whole stack of rods would spin in place since it’s locked together):

I also scaled +3% the nut to make it easier to screw on, and now post processing is not needed, and the strings have the added benefit to lock the nut in place kind of like teflon on a watertight joint.
Another issue i encountered, is that to accomodate differently thick spools you would need differently tall rods to go through them. I came up with a classical solution of just stacking washers on, this also helps the spool spin in place without spinning the whole stack:
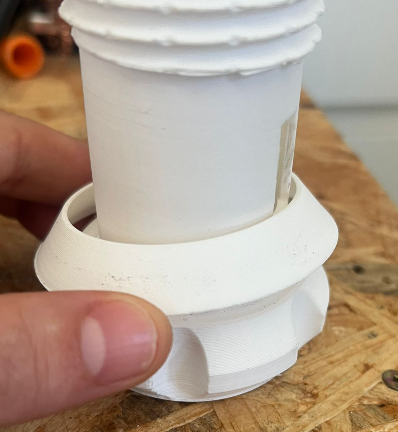
Lastly i modified one of the screw to be the stand for the stack, basically the bottom screw has a wide base to keep everything steady and not tip over:
printables link
All files can be found here
PS
Sorry for the large images, i wanted to use full res this time around to see how it does.
And as always thank you for your time reading this. Happy making.